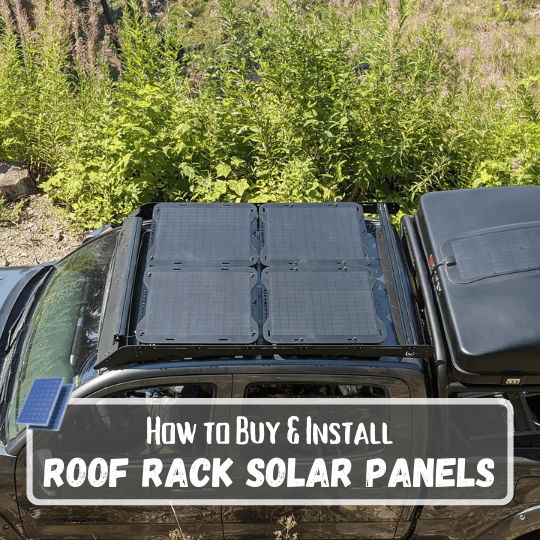
Do you have a roof rack on your vehicle and want to add solar panels?
I’ve installed roof rack solar panels on three different vehicles now, including my Toyota Tacoma overland build, my friend’s van conversion, and my own 4×4 overland van conversion.
In that time, I’ve tried various types of panels and attached them to different types of roof racks.
In this guide, I share which solar panels are most suitable for roof racks, a step-by-step guide on how to install them, and a brief overview of your battery options. Let’s dive in!
Types of Solar Panels
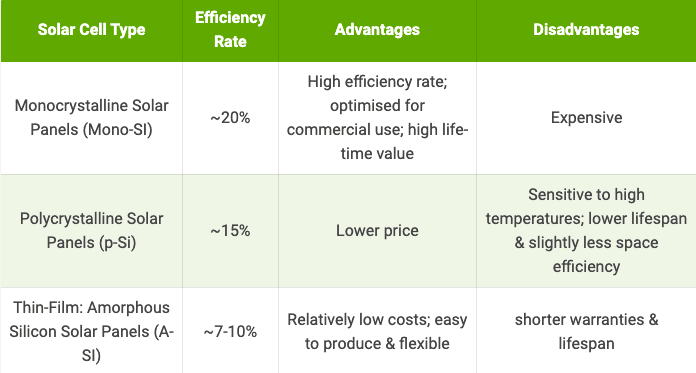
There are three main types of solar panels, each with its own benefits and drawbacks. The most suitable for you will depend on your set-up and how you intend to use them.
- Monocrystalline is made from a single pure silicon crystal and cut into several wafers. The use of pure silicon makes them space efficient and long-lasting. This also makes them an expensive option.
- Polycrystalline is made from multiple silicon fragments that are melted down. Less wastage means they are a cheaper option. However, they are less efficient at energy conversion to space. They also don’t hold up well under high temperatures.
- Thin film is made up of fine layers, thin enough to be flexible. For this reason, they can come in different sizes to suit different needs and are lightweight and transportable.
Best Solar Panels for Roof Racks
While thin film solar panel technology has come a long way, I don’t find them to be durable or efficient enough for a roof mount—they are more appropriate for sticking to roof top tents or camper roofs. Monocrystalline and polycrystalline will be more suitable options because of their durability.
We suggest the following:
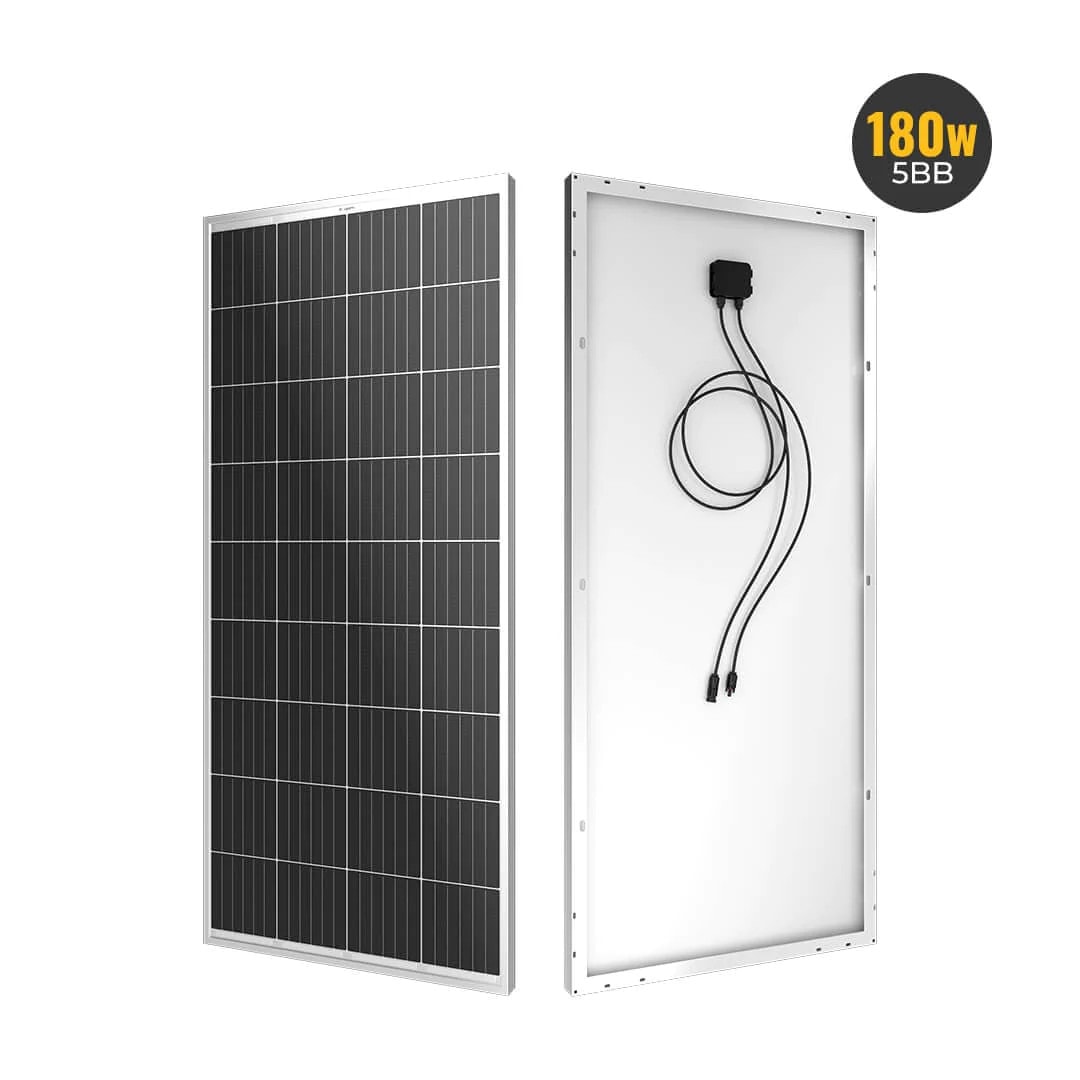
200W Renogy Monocrystalline Solar Panel
This solar panel is a great option for mounting on a roof rack. They are specifically designed to be durable against extreme weather conditions, making them ideal for overlanding adventures.
The following features put them at the top of our list:
- Anti-reflective, high transparency, low iron-tempered glass with enhanced stiffness and impact resistance.
- Pre-drilled holes on the back of the panel allow for fast mounting and securing.
- Advanced encapsulation material with multi-layered sheet laminations enhance cell performance and provide a long service life.
- Guaranteed positive output tolerance (0-3%); withstands high winds (2400Pa) and snow loads (5400Pa).
- Corrosion-resistant aluminum frame allows extended outdoor use; the panels can last for decades.

BougeRV Mono Solar Panel
This solar panel is designed specifically for mounting on the roofs of vans, trucks, trailers, and RVs, which means it has plenty of features that make it a great option.
- It’s compact, at about 8% smaller than other 200W solar panels but can generate the same or more power. However, I have heard they don’t hold up quite as long as Renogy’s panels.
- Pre-drilled holes for easy installation.
- Comes with an 18-month product warranty and a 25-year warranty for power.
- Extremely weather resistant.
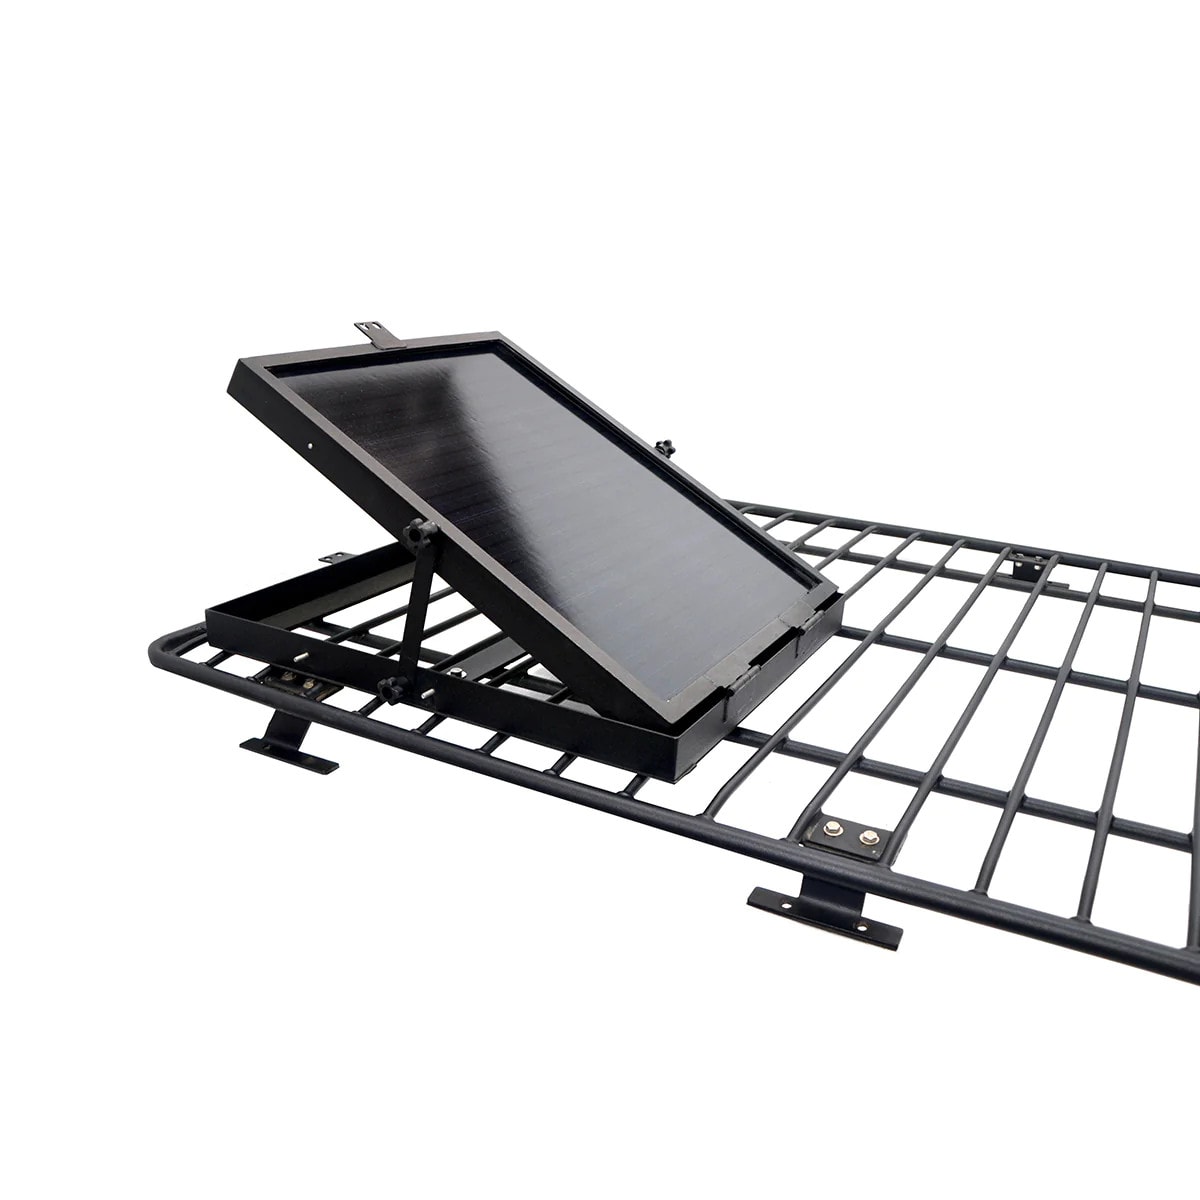
Suner Power 50W Solar Panel
Alternatively, if you have less space or don’t need as much power, you can opt for a smaller 50W square panel and pair it with an adjustable roof rack mount.
There are a few benefits to this kind of rack mounting:
- Easy to take solar panels on and off, so you don’t have to commit to permanent fixtures.
- Cheaper option, so could be good for beginners.
- Ability to angle the solar panels to ensure maximum sun exposure.
- No drilling required.
Related Reading: Are Solar Panels Good for the Environment?
How to Choose the Right Solar Panel for You
This is the first stage of installing roof rack solar panels. You’ll need to complete a solar power use survey. These can be time-consuming but are an essential part of choosing the right solar set-up for you and to avoid having too much or too little panel wattage.
On average, if you’re powering a compressor fridge, inverter, lights, and chargers, you’ll need 120W or more. However, if you’re just wanting some backup power for lights at night and to charge your devices, you could probably get away with 80-100W.
If you have more specific power needs, check out this in-depth power survey template to get started. Once you know how much power you need, you’ll be able to work out how many solar panels you’ll need and what capacity will be best to power your solar system. Use this sample worksheet to help you figure it out.

Related Reading: Overland Solar Setup: Exactly How to Power Your Adventures
Step-by-Step Guide for Installing Roof Rack Solar Panels
Now you’re able to choose the right solar panel, you need to know how to install it. Before starting, always check you have everything you need. Follow this simple checklist to make sure you’re not forgetting anything:
- Rubber grommets: To make sure wires don’t get damaged by the vibrations of the vehicle.
- Drill: With 9-9.5mm drill bit.
- L brackets: This is the best option for damage-free and reliable installation.
- Mastic tape: To seal the cable housing and ensure it is waterproof.
- Cable seals/housing: The Renogy Cable Entry Housing is a good option for safely and securely feeding the cables into the vehicle from the roof.
- Sealant: I recommend covering all fastenings with silicone to ensure they are watertight.
- Solar panels of your choice: Remember to keep them covered when wiring your battery to avoid a current running through the wires.
- Solar charge controller: Regulates the voltage and current coming from the solar panel.
- Connectors: Check out this guide to find out what connectors you’ll need.
You can usually find a mount kit that includes the majority of these items. However, they’re not always the best value for money, and you’ll often need specific types to suit the solar panels you choose.
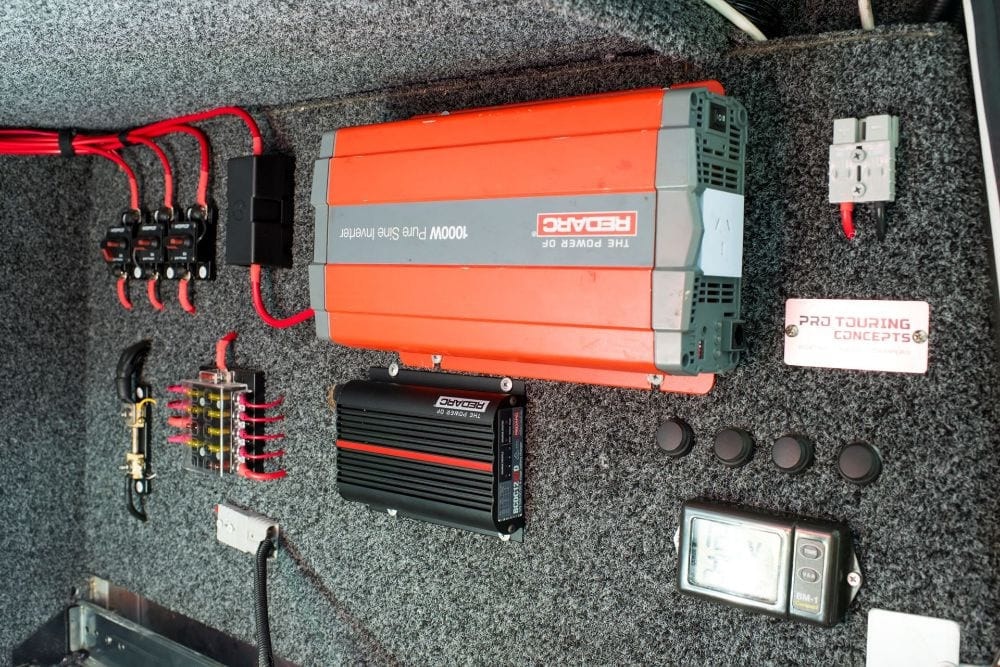
I personally love the REDARC options:
5 Simple Steps to Install Roof Rack Solar Panels
- Measure everything. This includes the distance between your roof racks, the solar panel, the surface area of your roof rack space, and solar panels. It may seem tedious, but when you’re speeding through rough terrain, any discrepancies in measurements will soon become clear. You don’t want to spend hundreds on a solar setup for it to get damaged on your first test run.
- Double-check fittings. Before drilling any holes or making any permanent markings, be sure that everything fits in its place perfectly. Make sure the solar panel mounting fits under the roof rack, and they both fit on your roof.
- Mark out your holes. When dry-fitting, line up your L brackets and mark out any holes you’re going to need to drill. Be super clear so you don’t forget any and remember when it’s too late.
- Drill and bolt. Drill your holes, place the solar panels where you want them, and bolt the L brackets to the panels and the roof rack. Be sure to add a protective coating, such as spray paint, to any exposed metal to avoid rust.
- Run solar cables into the vehicle. Feed your cables either down into the hood or under the truck into one of the grommet access holes. Then attach and seal the housing to the surface of the roof and use mastic tape around the edges to ensure it’s fastened securely and watertight.
Check out this tutorial for a visual aid:
Battery Options
There are two main batteries to consider for your power system, lead-acid and lithium. There are a few different types of each option. Use this calculator to find out what size battery would be suitable for you.
Check out our dual-battery setup guide for a more in-depth look at battery options and using multiple batteries in your rig.
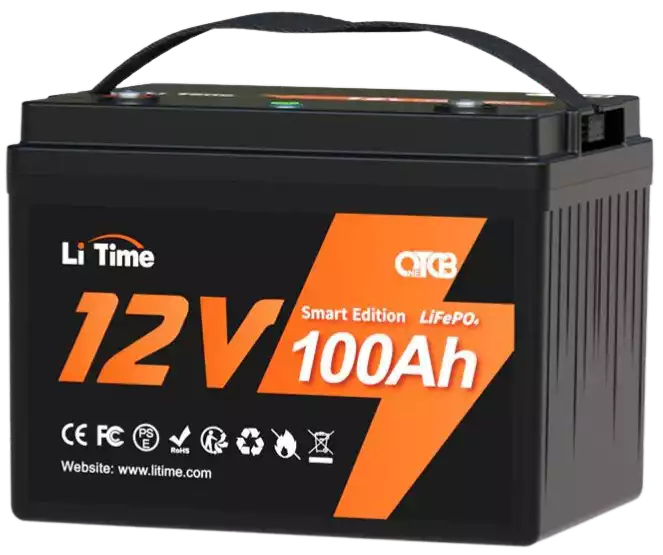
If you only need to power lights and small appliances, this 100Ah LiFePO4 battery is the perfect addition to your kit.
Use coupon code "AOTR" for 4% off your order!
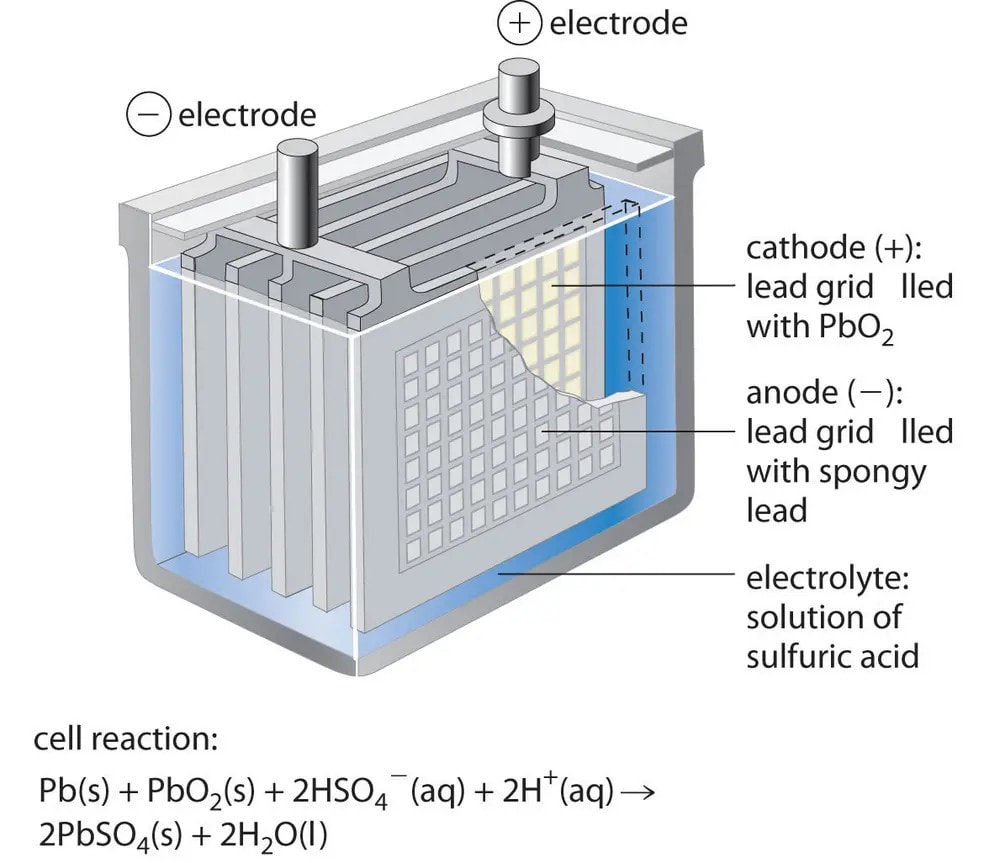
Lead-acid Batteries
Lead-acid batteries are a cheap and durable option for solar projects on a budget. However, if the battery is discharged too much, it limits its lifespan—meaning you can’t use it to its full capacity. A lead-acid battery shouldn’t be discharged below 50% of its capacity, so a 1200Wh battery only has 600Wh of usable power.
They are also very heavy, as they are made from lead. There are three main types:
- Flooded lead-acid: These batteries are the cheapest option but also the most unsafe. They contain liquid sulfuric acid that is very corrosive and can often leak out as a “mist”.
- Gelled electrolyte lead-acid: This option is maintenance-free and is more efficient than flooded options. However, various issues arise with using a gel as a solution. For example, the gel can liquify when charging, and it can take up to an hour to gel again.
- Advanced glass mat (AGM): This is by far the best solution if you do opt for a lead-acid battery. The material has a very low electrical resistance, meaning it can deliver higher power and efficiency. There is also no way for the acid to slosh around, meaning it is a lot safer than other options. For these reasons and the sealing, these batteries have a very long lifecycle.
Lithium Batteries
I’d always suggest opting for a lithium battery to harness the power from your solar roof. They have a longer life cycle than lead-acid batteries and can be discharged as low as 20%, giving you 30% more effective power per battery.
They also charge faster than nearly all other battery options and don’t need ventilation, so are a safer choice.
Lithium is the best battery to harness solar energy because it is lightweight and smaller compared to other batteries, lasts longer when taken care of, and is more efficient. They cost more upfront, but they’re worth the investment.
Take a look at the 12V 100Ah LiTime LiFePO4 Battery. It is half the weight of a lead-acid battery, and it can be discharged to 80%, meaning it can deliver nearly twice the amount of power. As it’s a lithium iron phosphate battery, rather than lithium-ion, its life cycle lasts 4x longer and is safer due to better heat regulation.
| Lithium Pros | Lithium Cons |
| More power for less weight | Expensive investment |
| Safe to operate sideways | Harder to replace |
| No ventilation required | |
| Long lasting | |
| Faster charge than other batteries |
Conclusion
Roof rack solar panels are a fun and exciting DIY project. Having reliable off-grid power is invaluable for your adventures. You can stay out for longer and use clean energy, which is better for the environment.
With this guide, you’ll be able to do the installation yourself. But always double-check with a professional electrician before you begin.
If you have any questions about how to set up your roof rack solar panels, drop a comment and I’ll get back to you.
In the meantime, take a look at more of our helpful guides: