The allure of overlanding, for most, is being off-grid in beautiful locations.
But just because you’re off-grid, doesn’t mean you don’t want a working fridge for food and cold beer, or a fan to cool you down.
Having power makes life easier — period. That holds true even when off-roading.
One of the easiest and most reliable ways of having off-grid electricity is with a dedicated overland solar setup. As long as the sun is shining, you’ll have power.
So how do you get an overland solar setup? What do you need to make it work? What options do you have?
I’ve been off-roading and overlanding with solar for years, and I’ve tried many different setups from portable to permanent installations. And below, I share everything I’ve learned.
Let’s dive in!
How Does Solar Work?
Solar power works by converting sunlight into electricity using a solar panel. It does this by using a semiconductor layer contained in solar cells, which use the movement of electrons to produce power.
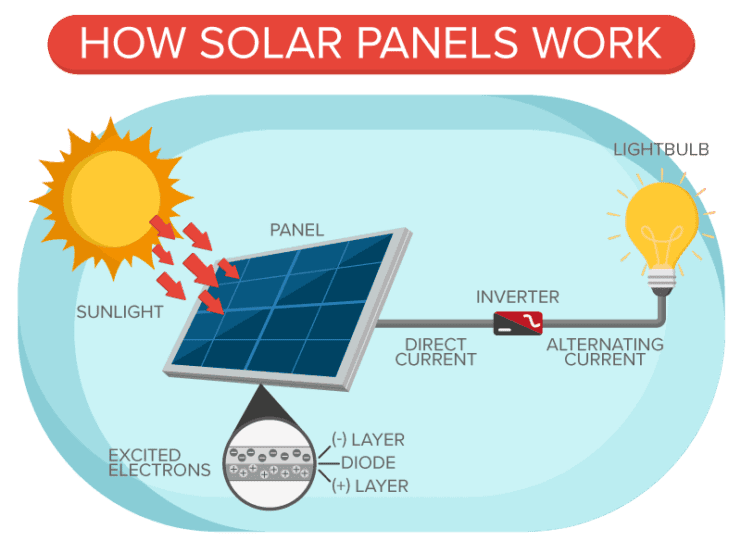
This is an overly simplified explanation, of course. If you want to learn more of the science behind how solar panels work, check out this guide.
Types of Solar Panels
There are three types of photovoltaic panels:
- Monocrystalline – Made using a single cut of pure silicone, these are the most efficient type of panel. However, they are also the most expensive.
- Polycrystalline – Polycrystalline panels, or multi-crystalline panels, are made with additives into the silicone. While they are cheaper than monocrystalline, they are also less efficient due to the impurities.
- Thin-film – Made from a variety of different materials, such as amorphous silicon, these flexible panels can bend to fit curved surfaces like a rooftop tent or roof rack. This makes them lighter, less expensive, and less susceptible to damage from vibrations (such as micro-cracks). However, they are usually the least efficient of the three types of panels.
Most overland solar panels are either monocrystalline (to make the most efficient use of space) or thin-film (to be easily applied to awkward rooftop tents and to cut down on weight).
Related Reading: Best Roof Rack Solar Panels for Overlanding
What Overland Solar System Options Are There?
Once electricity is created with a solar panel, you need a few things to make that energy storable and usable in your overland solar system.*
This is where a battery system (permanent) or power station (portable) comes in.
*Note that most portable solar panels nowadays come with the ability to plug small USB and USB-C devices directly into them. But if you want to store and use that power later, you need one of the following systems.
Permanent Battery Setup
Permanent solar systems require a few pieces to operate smoothly, including:
- Solar panels (duh)
- A charge controller
- A battery
- An inverter (if you want to power 110-volt appliances)
- A fuse or fuse box
(Renogy offers full overland solar kits here.)
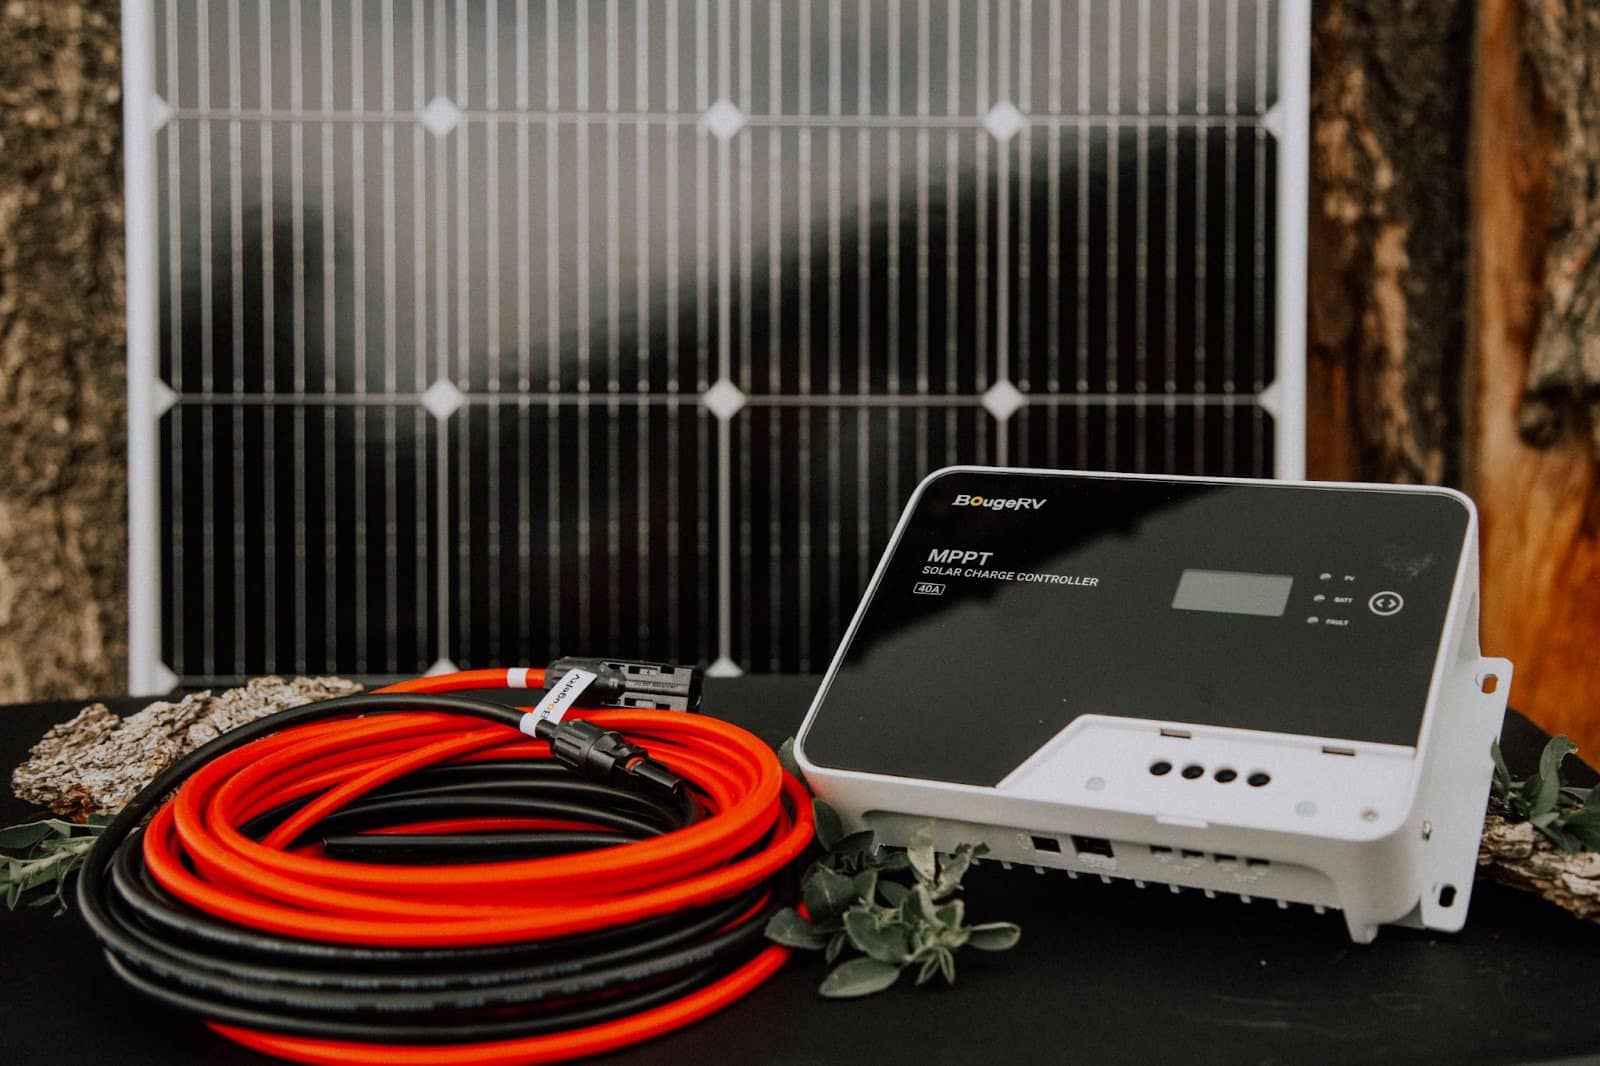
Charge controllers ensure you get the proper voltage to safely charge your battery, and that you don’t overcharge and damage your battery. We use this 40 amp MPPT charge controller by BougeRV.
As far as batteries go, you have three main options:
- Lead Acid – The cheapest and most reliable option, lead acid batteries have been around a long time. There are two types—flooded and sealed. Flooded (sometimes called “wet cell”) batteries need to be maintained with distilled water. Both types need ventilation, so they are not safe to have inside your vehicle. They only last 5-10 years.
- AGM (Absorbent Glass Mat) – AGM batteries are completely sealed lead acid batteries that require zero maintenance, can be mounted in any direction, and don’t off-gas (so they can be installed inside a vehicle). This combination of traits makes them a great choice for solar setups.
- Lithium – Lithium batteries (sometimes called “li-ion”) are the longest-lasting, lightest, and fastest-charging option. They can also be discharged down to 20% as opposed to the 50% of the other battery types and can hold a charge for longer. However, all this comes at a cost, as they are also the most expensive option by a large margin.
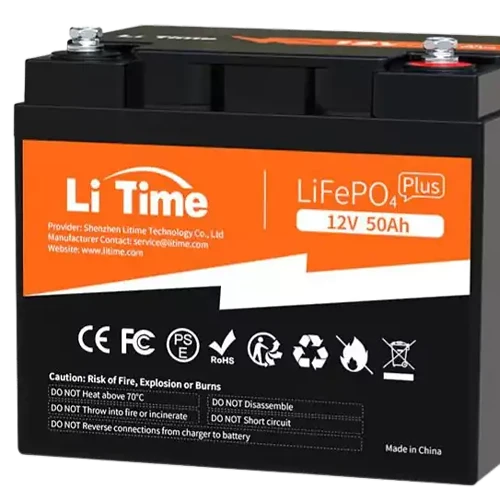
This 50 Ah lithium battery makes an excellent drop-in replacement for your existing lead acid vehicle battery.
Which battery type you choose, once again, depends on your needs and budget. Personally, we chose this 100 Amp-Hour Lithium-AGM Hybrid battery by Renogy for our setup. I wouldn’t go with a lead acid battery unless you know how to properly maintain it and have a good spot to mount it outside your vehicle.
That said, a lithium battery is going to be the most efficient and long-lasting battery option if you can afford them. This 50Ah LiFePO4 battery can be a direct replacement for your vehicle battery and still be used to power some of your stuff while overlanding. Check out our full guide to dual battery setups if you need even more power!
In addition to the battery, if you want to power 110- volt appliances (like a toaster, blender, or string lights), then you’ll need an inverter as well. An inverter converts the 12-volt direct current (DC) energy provided by your battery and solar panels into the 110-volt alternating current (AC) energy needed by most appliances.
Personally, we use and love RedArc inverters because they are built to take the abuse of overlanding and use pure sine wave, which is the cleanest and most efficient energy conversion technology available today. However, Renogy and many others have more affordable (albeit less efficient and less durable) options.
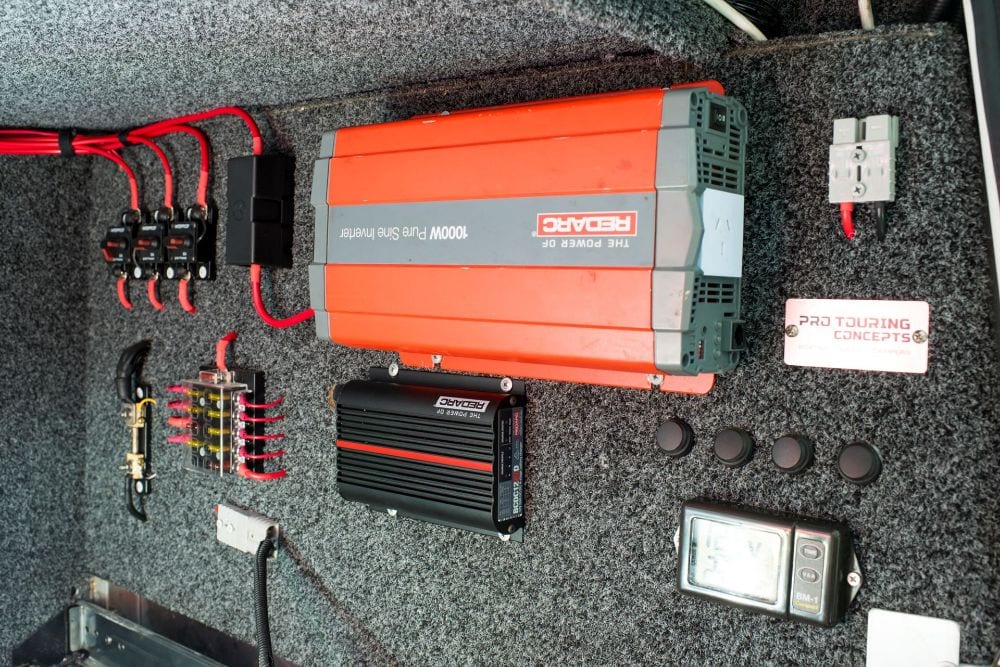
Finally, your setup needs a fuse to keep things from catching on fire in the event of an electrical short or malfunction. If your setup is simple, you only need a single fuse on the positive cable going from your charge controller to your battery. If it’s more complex, you’ll need multiple fuses in a fuse box.
Of course, you can add other things to solar systems, like battery monitors and other components to keep an eye on how effective your system is at any one time. But this is a basic overview for the complete beginner.
Here’s a video explaining how to wire a simple overland solar system:
Portable Power Stations (The Simpler of the Two)
Portable solar power stations make life easier. While installing a permanent setup isn’t that complicated, a portable solar generator system allows for simple plug-and-play without needing to install anything.
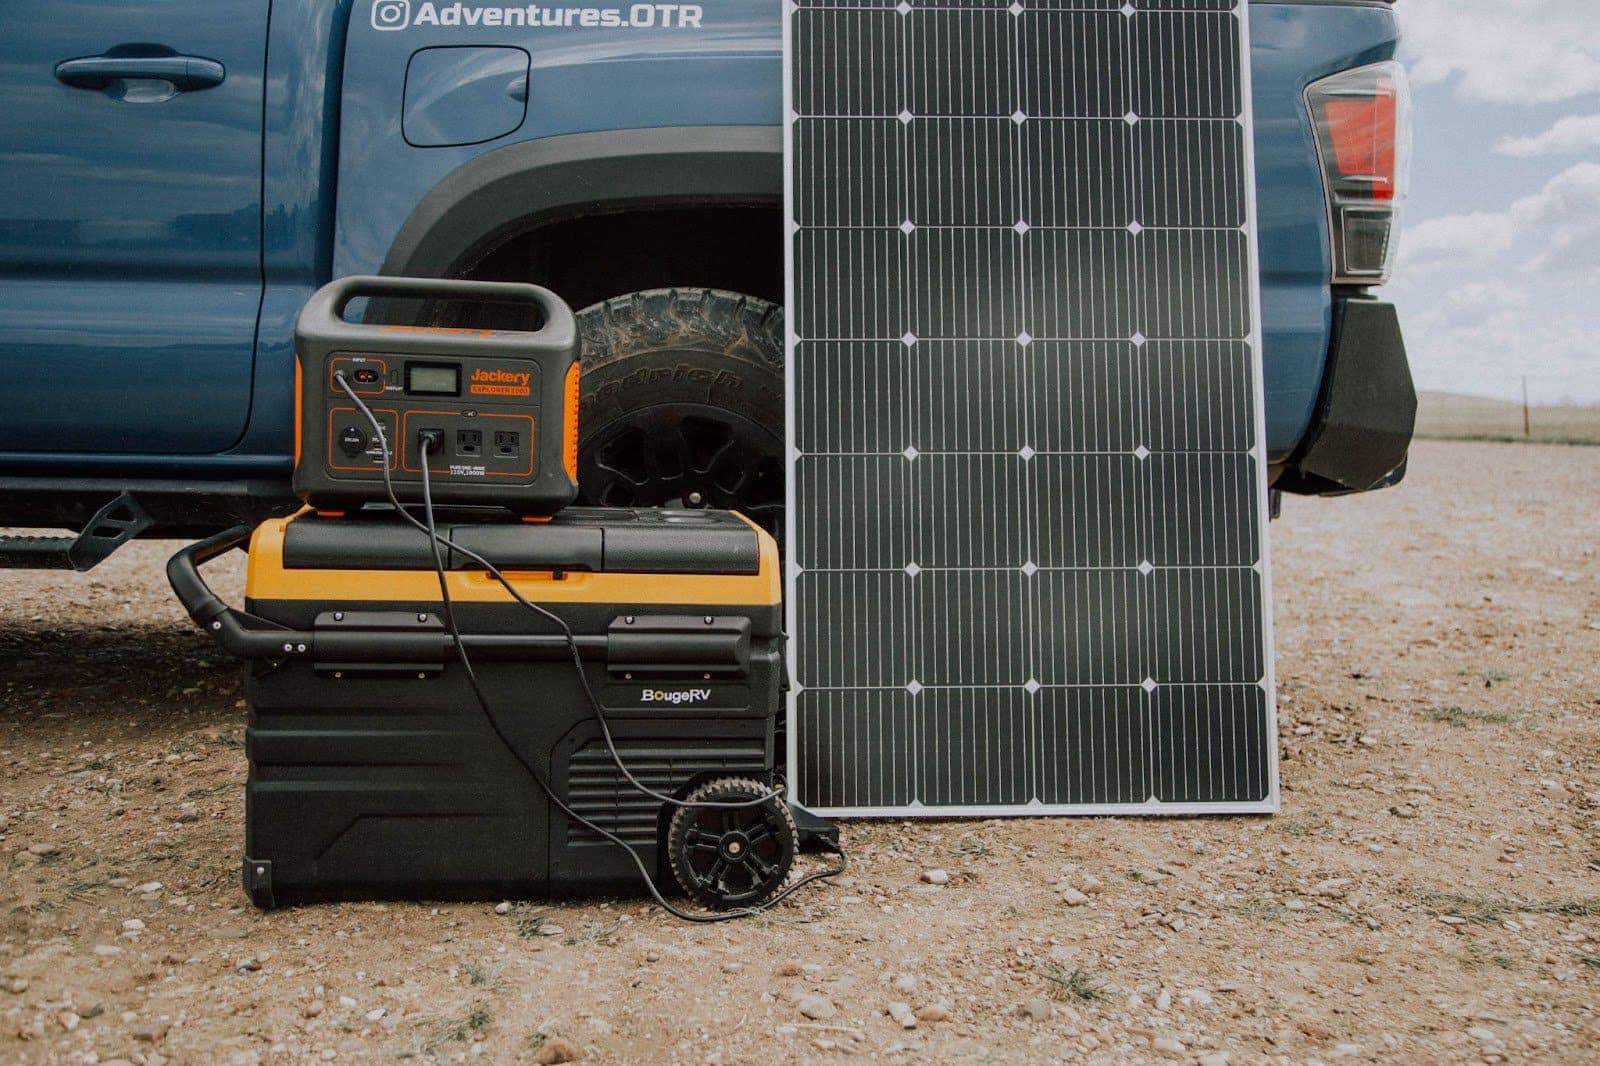
Basically, a solar power station is a battery, charge controller, inverter, fuse box, and battery monitor all built into one self-contained system. You plug your solar panels directly into them, and they have a variety of ports for both AC power output and DC power output.
Some options for a portable solar power setup include:
We actually own and use all three of them, and can honestly say you can’t go wrong with any of them. Just pick the one that matches your storage capacity needs and budget.
Read our Jackery Explorer 300 review here.
How Much Solar Do You Need for Overlanding?
When deciding on your solar system, you need to know your power demands. How much power production and storage will you use?
You can determine that with some simple math. First, figure out what you’ll be using on a daily basis. Many overland vehicles have some of the following electrical appliances:
- Toaster
- LED lights
- Portable Refrigerator
- Laptop(s)
- Phone(s)
- Fan
- Air Compressor
Figure out all the appliances you’ll use on the road and what their watt or amp requirements are. If you’re unsure, look it up online. In general, most toasters use ~700 watts per hour, most portable fridges use ~40 watts per hour, and most phone chargers use ~5 watts per charge.
If you see amps instead of watts, the conversion formula is watts = amps x volts. So for a 12-volt device that draws 10 amps per hour, you get watts = 12 x 10, which gives you an energy usage of 120 watts per hour.
So to use a toaster for a few minutes in the morning, charge a phone once a day, and run an overlanding fridge, you would need roughly 1,024 watts per day—5 for a phone charge, 59 for 5 minutes of toaster use, and 960 for 24 hours running your fridge.
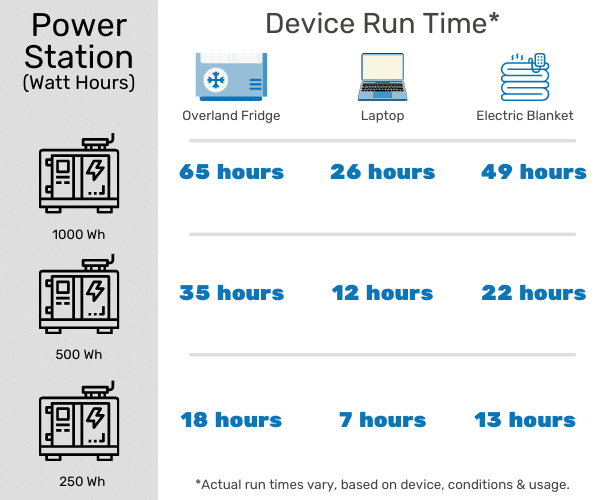
This means you would need at least 500 watts of power storage and a 60-100 watt solar panel to charge it, although I would opt instead for 1,000 watts of power storage and two 100 watt solar panels to be safe (in case you run into a lot of cloudy days).
Here’s a visual overview with example run-times based on storage capacity:
What Are Volts, Amps, and Watts?
In case you’re confused on all this terminology, here’s a simple explanation using a water hose analogy:
- Volts are like the water pressure. It’s the pressure of electricity through a wire. Your battery and solar panels will typically be 12-volts, and home appliances will typically be 110-volts. You need an inverter to change the voltage from 12 to 110.
- Amps are like the amount of water that is going through the hose, or the amount of electricity going through the wire. Similar to a water hose, amps can be limited or diluted based on wire gauge size. A bigger wire gauge can carry higher amps, but would also lessen the effectiveness of transferring lower amps.
- Watts are the total energy output potential based on volts and amps. It’s how much water comes out of the hose, or electricity out of the wire. Remember, Watts = Volts x Amps.
Hopefully this helped you understand all these terms!
Final Thoughts
Overland solar panels and solar systems allow for clean, renewable energy that doesn’t require fuel. While gas generators can provide more power (so long as you have the fuel), they are more dangerous and much louder and annoying to use than solar power systems.
If you have any questions on how to set up a solar system, drop a comment below! I’ll do my best to get back to you.
In the meantime, here is some other cool overlanding content you might like:


